
Hone your skills with our collection of “how to” instructions and video tutorials
HOW TO trainings
VIDEO TUTORIALS
HOW TO STAMP
VIDEO TUTORIALS
TYING TO CARD
VIDEO TUTORIALS
HELP SOMEONE FIND THEIR WORD
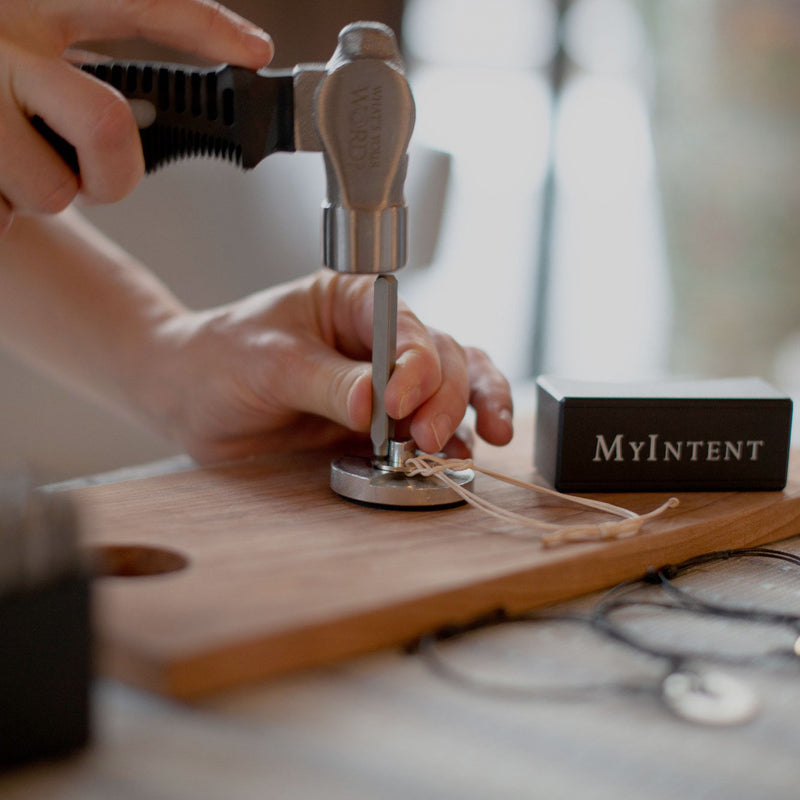
HOW TO STAMP
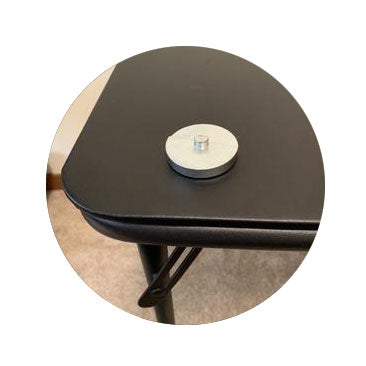
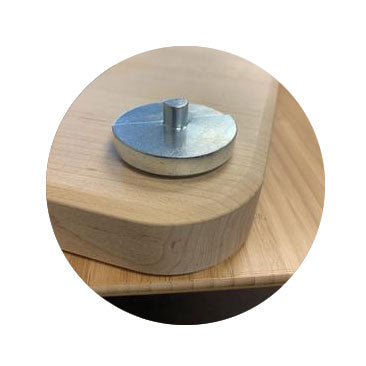
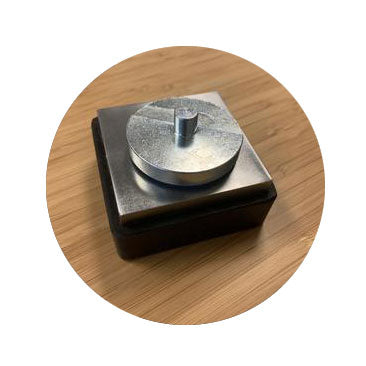
1. FIND A SOLID SURFACE
The surface that you stamp on has a significant impact on the stamping depth - the sturdier the surface, the deeper your letters will be. If stamping on a table, make sure to stamp over the leg of a table. Also, try stamping on a concrete floor or brick ledge to find your favorite surface.
Pro tip: If stamping on a table or kitchen counter, try adding a thick wooden cutting board.
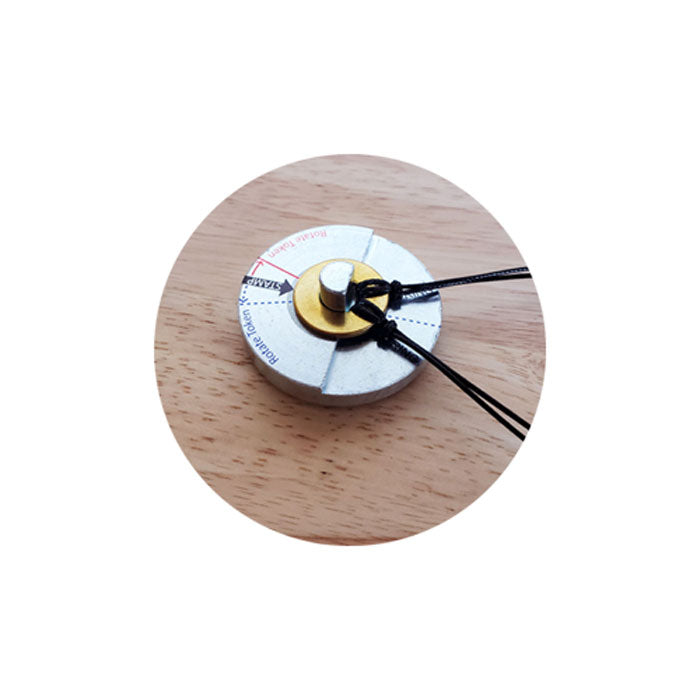
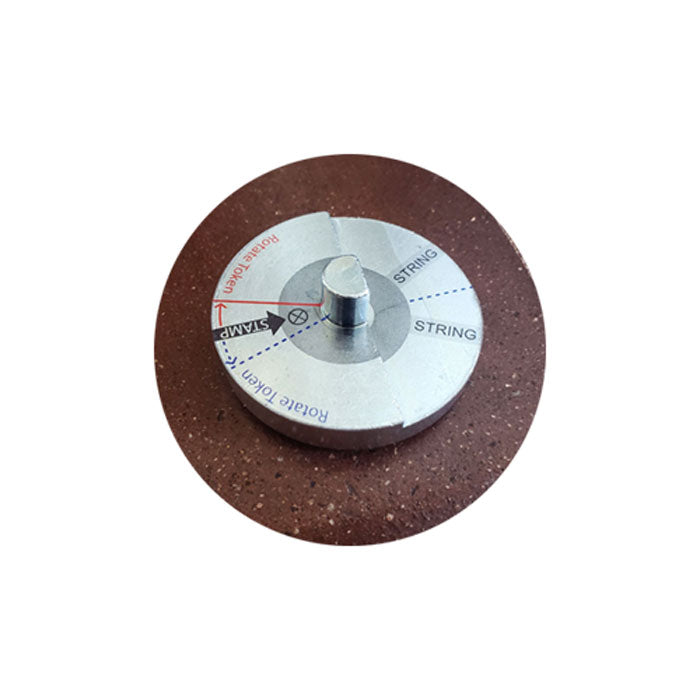
2. PLACE BRACELET ON BASE
Pull the strings together and place bracelet on metal base. Strings should be on the ledge portion.

3. STAMP AT BOTTOM OF TOKEN
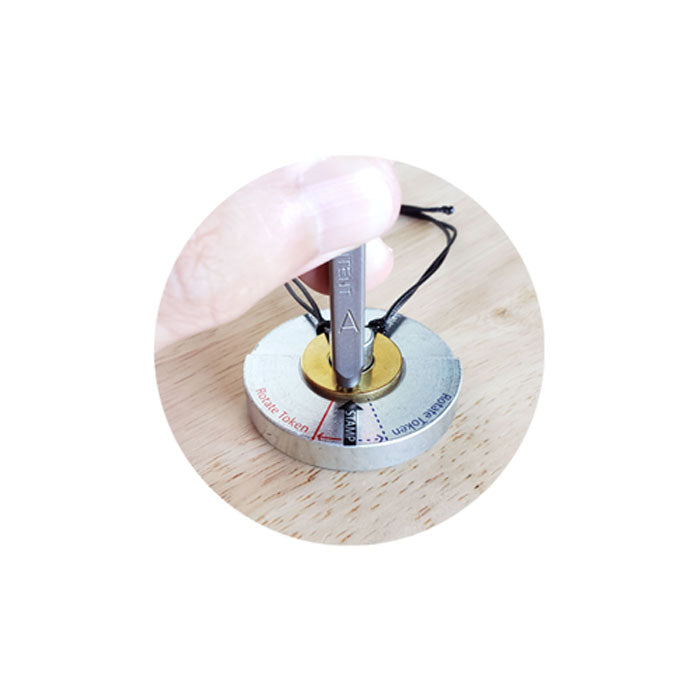
4. ROTATE STAMPED LETTER TO THE RED LINE, STAMP NEXT LETTER
Rotate the stamped letter to the red line, then stamp again at the 6 o'clock position.
For consistent spacing, rotate the token the same amount each time using the guidelines.
1. FIND A SOLID SURFACE
The surface that you stamp on has a significant impact on the stamping depth - the sturdier the surface, the deeper your letters will be. If stamping on a table, make sure to stamp over the leg of a table. Also, try stamping on a concrete floor or brick ledge to find your favorite surface.
Pro tip: If stamping on a table or kitchen counter, try adding a thick wooden cutting board.
2. PLACE BRACELET ON BASE
Pull the strings together and place bracelet on metal base. Strings should be on the ledge portion.
3. STAMP AT BOTTOM OF TOKEN
4. ROTATE STAMPED LETTER TO THE RED LINE, STAMP NEXT LETTER
Rotate the stamped letter to the red line, then stamp again at the 6 o'clock position.
For consistent spacing, rotate the token the same amount each time using the guidelines.
ALIGNMENT TIPS
• Freestyle a bit using the practice tokens included with each Maker Kit. Try some wide spacing, try some tight spacing and you’ll get a feel of how far to turn the token after each letter.
• Note, the letter “W” is a bit wider than other letters and the letter “I” is a bit thinner, so you can adjust the spacing for these two letters.
• Each stamp has a letter etched into it. Make sure the letter on the stamp facing towards you. This avoids stamping upside down or sideways.
• Place a two finger grip at the bottom of the letter stamp up against the stamping base to firmly ground your letter stamp, keeping it from moving.
• Before striking, focus on the top of the stamp. This will avoid missing or hitting stamp at an angle.

STAMP WITH DEPTH
The surface that you stamp on has a significant impact on the stamping depth and noise. Try some different surfaces and find your favorite!
Below are some surfaces that can help you achieve your desired depth.
Folding Table:
Depth: 1 - Noise: 5

Standard Table:
Depth: 2 - Noise: 4
Standard Table + Thick Cutting Board:
Depth: 3 - Noise: 3
Steel Block
Depth: 4 - Noise: 2

Wood Stamping Post:
Depth: 5 - Noise: 2
Concrete / Brick:
Depth: 6 - Noise: 1
.
Folding Table:
Depth: 1 - Noise: 5
Standard Table:
Depth: 2 - Noise: 4
Standard Table + Thick Cutting Board:
Depth: 3 - Noise: 3
Steel Block
Depth: 4 - Noise: 2
Wood Stamping Post:
Depth: 5 - Noise: 2
Concrete / Brick:
Depth: 6 - Noise: 1
.
STAMPING DEPTH TIPS
• It takes a little strength and courage to get deep letters. Don’t be afraid to hit the stamp with power - focus, breathe, HIT!
• You can hit each letter more than once, just make sure to keep the stamp in place so you don’t get double letters.
• If you want to re-stamp a letter, just place the letter stamp against the letter you've already stamped and feel the groove. It'll "lock in" and then you can stamp again.
• You don’t need to hit as hard for the letter "I" to achieve the same depth as other the letters.
• You can hit each letter more than once, just make sure to keep the stamp in place so you don’t get double letters.
USE QUESTION CARDS
The great thing about our Question cards is there are many different ways to use them! The cards have been designed to spark conversation, to allow reflection, create open-mindedness and space for people to think about an area of their life where they could use a WORD. Below are a few examples of ways Question cards can be used:

GROUP SETTINGS
Ice breaker exercise in a small group setting (3+ players) Start by spreading the cards face down in a pile on the floor or table. Have each participant pick three cards from the pile. Allow time for each player to reflect on each question, either mentally or by journaling. Go around the room and have each player share one question and answer with the group.
Ice breaker exercise for large group setting (15-33 participants) Have a volunteer stand in the front entrance of the room to pass out a question card to each person as they arrive. Encourage participants to answer the question and use it as a conversation starter when meeting other participants.
Pass out questions to each participant as they enter. Once participants have all entered and received a question gather everyone up into a large circle. Move in a clockwise direction having participants introduce themselves followed by reading their question and their answer.
TO HELP SOMEONE FIND THEIR WORD (2 PLAYERS)
Start by shuffling and spreading out the cards on a table. Next, each player will pick up three cards. Allow time for each player to reflect on the questions in their hand. Next, each player will choose one question card that spoke most to them and share the question and answer. The other player's job will be to listen along with asking follow-up questions to help guide them to finding their WORD. An example could look something like this:
Q: "Where have you found peace?"
A: "I find peace when I find time to read."
Q: "What would you have to do to find more time to read?"
A: "Find Balance in my life."
The person’s WORD might then be BALANCE.
After the first player finds their WORD it will be the second player's turn. Players may repeat the process until both have chosen a WORD.
DATE NIGHT (2 PLAYERS)
Start by shuffling the deck and placing deck into a pile in the middle of the table. Partner one will draw the first card and read the question on the card followed by either answering the question or asking partner 2 for their answer. After the first question is answered, it is partner 2s turn to draw a card and either answer or have partner one answer. Repeat the process until all questions have been answered.


GAME NIGHT (3+ PLAYERS)
Start by spreading the cards face down in a pile on a table. Have each player pick a card from the pile. Allow time for each player to reflect on each question. Player 1 will start by reading the question out loud and either answering it or asking the player to their left to answer it. Repeat the process moving in a clockwise direction until all questions have been answered. Watch how much you can learn about one another is such a short amount of time!
PERSONAL REFLECTION
6 Days of Reflection: Start by separating the deck into the six categories of questions (love, dream, be me, let go, grow, serve) Choose one category each day for the next six days. Use a journal to write down your answers to each question in the category.
Example: Day one could be answering each question that falls under the “Love” category. Take time to pause and reflect on questions that spark more emotion than others.
A fun way to start the day: Start by shuffling the cards. Pull one question card out each morning and write the answer in the journal. Once you are done answering all 33 questions either go back and reread your responses for more inner reflection or wait six months to see how your answers to these questions may have changed.

QUESTION CARDS ARE THE PERFECT GIFT FOR:
• Newly engaged/ newlywed couples
• Birthdays
• Stocking Stuffers
• Holidays
• Graduations
• Retirements
• Housewarming